Customize a Model for Your SnapML Lens App
Make mundane mobile app interactions ancient history using the remyx model engine for ML-model enabled experiences today!
In this tutorial, we’ll create a custom ML-powered Snapchat Lens using a model trained using the Remyx Engine. The Remyx Engine helps you quickly create custom ML model from simple natural languang descriptions. This post features the remyxai-cli for easy programmatic access. This tutorial should take around 30 minutes to complete.
Getting Started with Remyx AI
After setting up your reymxai account, navigate to the Account page where you can provision an API token. Click to create and copy the token into your ~/.bashrc with:
$ export REMYXAI_API_TOKEN="<YOUR_TOKEN>"
Let’s create a custom model for our Lens! You can do so via the UI at engine.remyx.ai but in this example we’ll use the remyxai-cli. It’s easy to install from pypi with:
$ pip install remyxai
Training a Model
For example, let’s make a Snapchat Lens to distinguish a set of instruments including - cellos, acoustic guitars, and electric guitars. Using the classify command, we’ll also specify a model name and a model size. We chose --model_size=1 to train a smaller model to be deployed on a mobile phone. To kick off a model training request from the command line, run:
$ remyxai classify --model_name="celloacousticguitar" --labels="cello,acoustic guitar,electric guitar" --model_size=1
This creates a fast classifier we named “celloacousticguitar” which label images with one of the instrument objects: cello, acoustic guitar, electric guitar. You can change the comma-separated list to differentiate between objects important to YOUR application.
Once the model is finished training (~20 mins), we can download and convert it with:
$ remyxai model download --model_name="celloacousticguitar" --model_format="tflite"
We chose to convert the model to tflite to meet the requirements of the SnapML platform.
To recap, with a few calls to the Remyx Engine, we were able to create a custom model and convert it to the appropriate format. We got to skip the full first half of the original guide which requires you to train a model on google colab after curating a custom dataset.
In your current working directory, you should see a .zip file with the model and metadata assets. Decompress it to reach the contents:
$ unzip celloacousticguitar.zip
...
$ ls celloacousticguitar/
celloacousticguitar.tflite metadata.csv
Making our ML Lens
Now we can add our model to a snapML Lens Template to quickly evaluate its performance on our mobile device. Launch the Lens Studio on your machine to get started. We modified the Multi-Label Classifier example to use our model and labels.
You can get our copy on the remyx-experiments repo or follow along the next steps. We recommend opening the Snapchat guide above in another window for additional visualizations for guidance.
Import the model example alongside the demo model files here:

On import, make sure the values match up to the example model scaling:
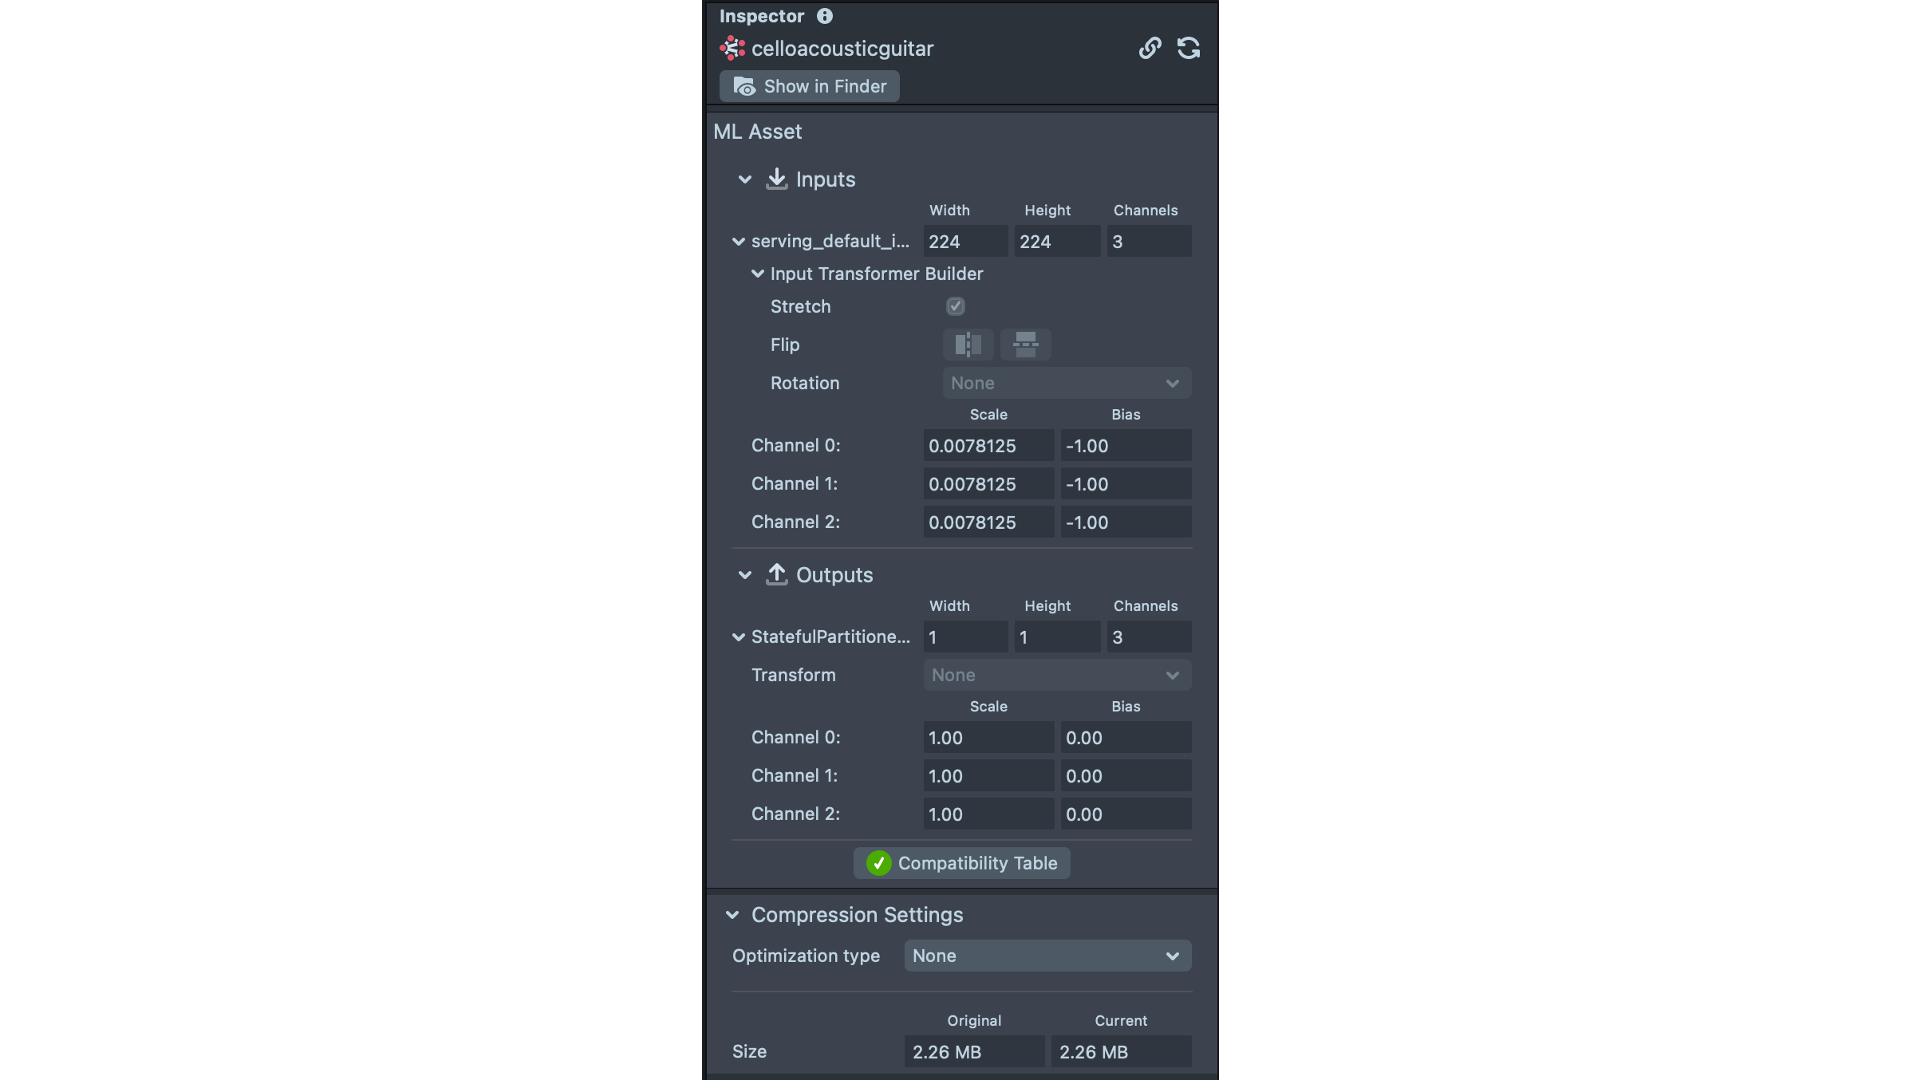
As shown here, update the model file to point to the newly trained model. You can look in the metadata.csv file to find the image dimensions (which already match what is used for this example) as well as the labels.
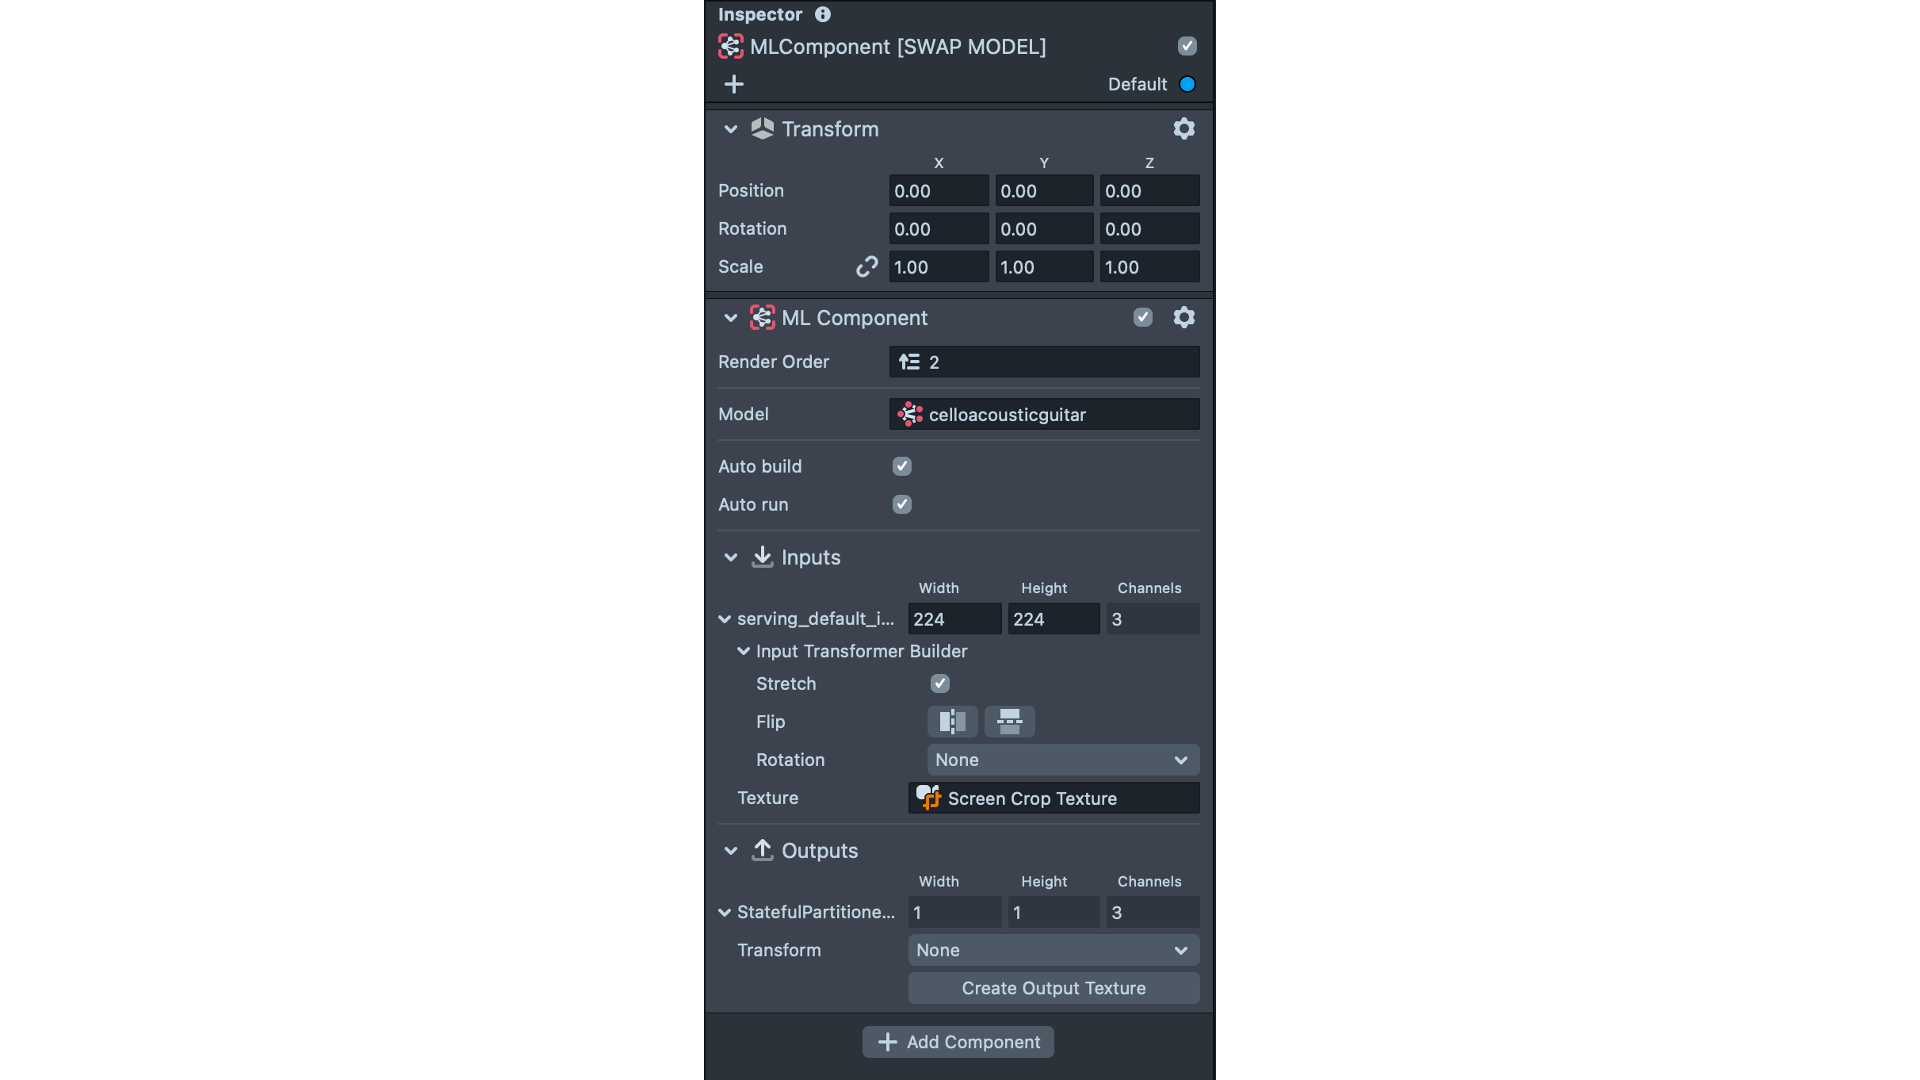
Update the labels included in the example to use your custom labels. It should look like:
script.labels = {
    "0": "cello",
    "1": "acoustic guitar",
    "2": "electric guitar"
};
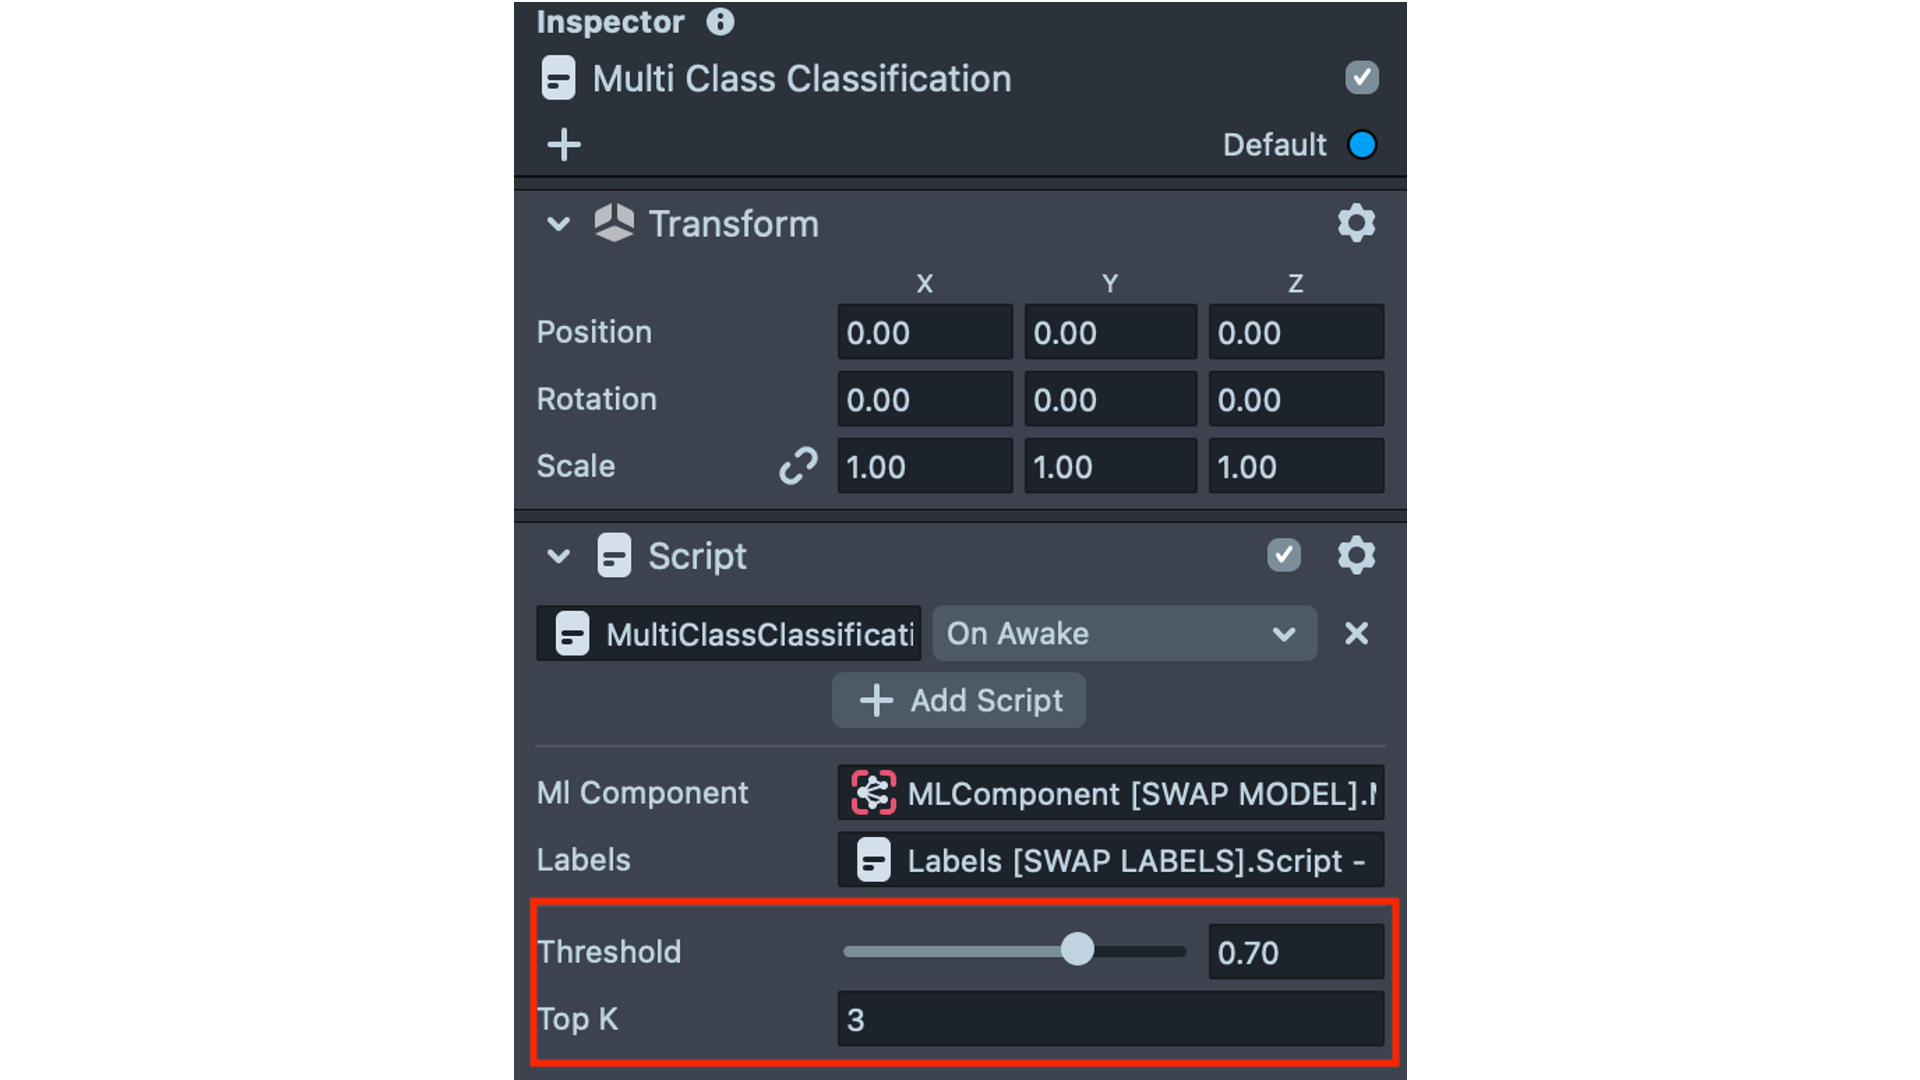
Now let’s update the topK variable found within the Multi Class Classification script to match the number of labels our model was trained with. In this case, we update the value to 3.
Save all your changes and we’re ready to deploy!
The Result
Link up your Snapchat account to Lens Studio so you can use your new lens! Use this guide to pair. Now point your camera to your subject and predict away.

We’re excited to learn about what you’ll build next! Share and tag our handle @remyxai. Stay tuned for more projects, tutorials, and breakdowns. 👹